I imagine these with the base of the feather in moss and standing vertically (classic), taped to an entry table with a simple piece of washi tape (modern) or even hanging from a branch (rustic) – all depends on your décor. Just please don’t leave them unsecured sitting on a table outside or in an entry, because with one gust your look will turn a little more “barnyard” than you might like. I originally conceived these as ‘save the dates’, but then sent one to myself in the mail. Results were a cracked feather and a sad blogger, so I can’t recommend.
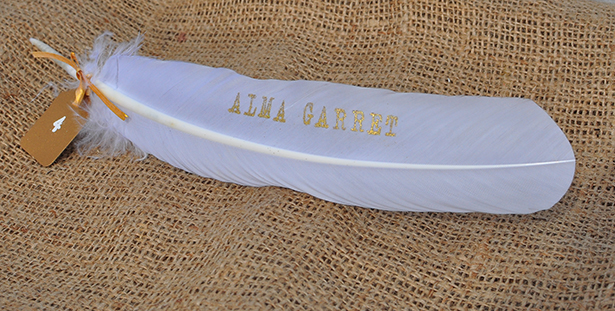
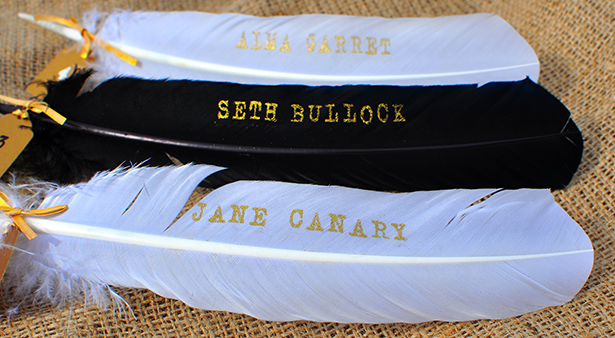
I’ve also seen elsewhere online where folks dip the tip of the feather in gold paint or the like, which is also beautiful and another way to “punch” these up if you so desire. Personally, I don’t think they need much more punch. I mean, they are feathers with names stamped on them! If I got one of these with my name on it at a wedding I would keep it and marvel over it, put it in a bud vase and generally act like Gollum about the whole situation.
The how to!
You will need:
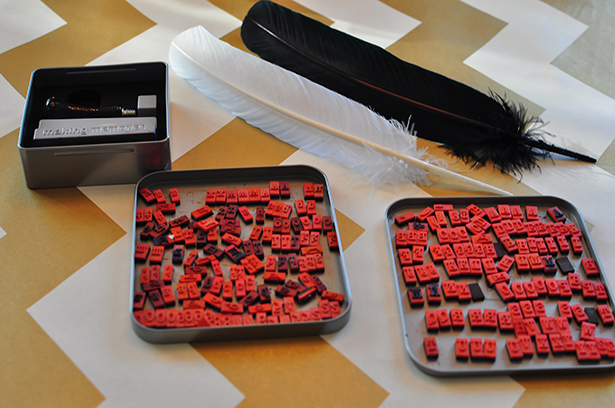
- Feathers ($0.40 each, and come in different colors).
- Stamp pad in color(s) of your choice.
- Embossing powder in color(s) of your choice (I like the detail powders)
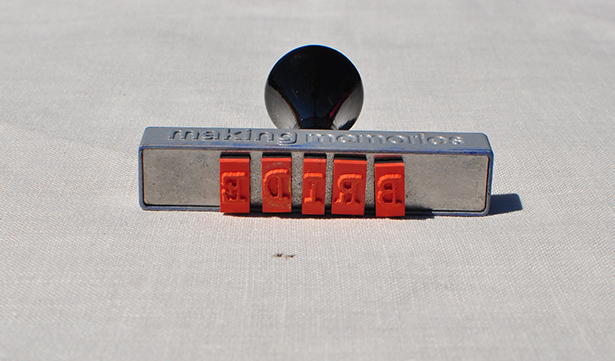
- Embosser
- Tag punch
- Letter stamping kit (I use this one because I like the typography font). The magnetic kit is key! Instead of stamping each letter separately you set them up on a nice magnetic base and can line up a whole word or words to stamp all at once. SO EASY.
- Ribbon in color of your choice. I used thin satin, but it’s up to you!
Steps:
1) Put letters of guest name on stamp pad. Hold the pad to a mirror to be sure you don’t have any backward letters.
2) Consider letter placement. For a long name you may have to stamp twice – first name above the quill, last name below. These are the toughest to do, and may warrant doing first initial, last name, instead of full name.
3) Stamp name.
4) Immediately cover wet ink with embossing powder. This is very important because the feather absorbs the ink, and it quickly becomes difficult for the powder to properly adhere.
5) Shake/blow off embossing powder. I like to do this over a clean piece of paper so that you don’t waste any powder and can put what isn’t used back in its jar. Tiny bits of powder may get caught in the feather. I found a flick against the base of the quill helped to knock those off, but it doesn’t have to be perfect. A little bit of extra color here and there on the feather can be very pretty.
6) Use your heat embosser from a good distance to melt the embossing powder. You want to be careful not to singe the feather. Use a back and forth sweeping motion.
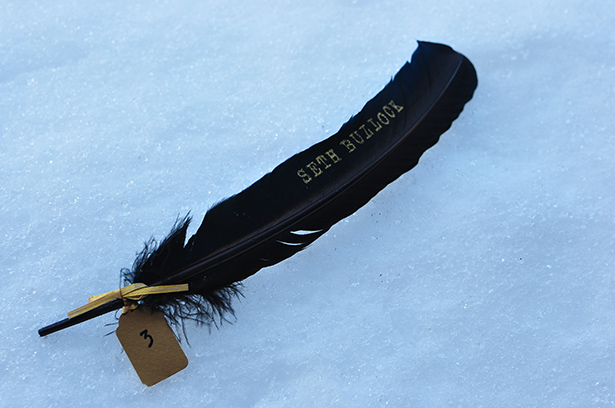
7) Use the tag punch to punch out a small tag, and write/emboss the table number on the tag.
8) Tie the tag to the feather using the ribbon.
And you’re done!
A couple of protips. The feathers are a natural product. They don’t like sitting flat. Be assertive and be sure to hold the feather as flat as possible when you stamp. Also, logistically, you may not know who is sitting where yet. That’s fine – just make a bunch of tags and tie them to the feathers once you know.
If you want to save time, you can make one feather per couple with the same name. So “Smith” instead of “Jon Smith” and “Jane Smith.” Of course, when a good number of your family guests will have the same last name as you and your fiancé, this may only work for friends. In that case, try “J&J Smith” on one feather.


Leave a Comment